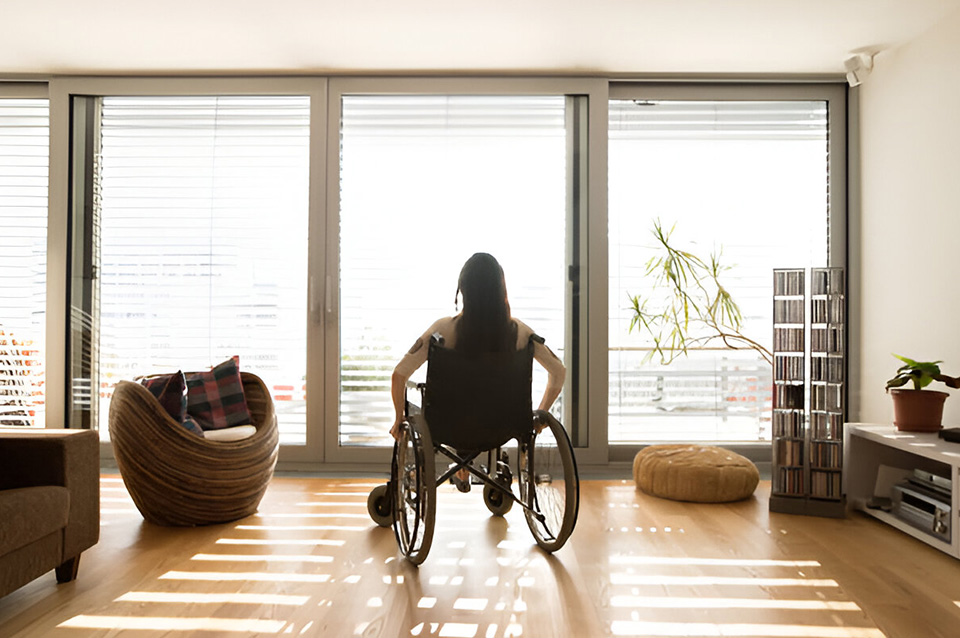
Finding the right Specialist Disability Accommodation (SDA) isn’t just about ticking boxes on a compliance form. It’s about finding a place where you’ll truly live, not just exist. A place where independence is possible, where technology works for you, and where every design choice makes daily life easier, not harder.
But here’s the reality: most NDIS participants only get one or two chances to inspect potential SDA properties before making a decision that will affect their daily life for years. That’s why knowing exactly what to look for during an inspection isn’t just helpful, it’s essential.
Whether you’re looking at improved liveability housing or high physical support accommodation, this comprehensive guide will walk you through everything you need to check, ask, and consider during an SDA property inspection. We’ve broken down the inspection process into clear, actionable steps so you can make an informed decision with confidence.
Why Property Inspections Matter More Than You Think
The NDIS SDA framework sets minimum standards, but not all SDA homes are created equal. Two properties might both meet the technical requirements, yet offer completely different living experiences. The difference between adequate and excellent accommodation can impact your independence, safety, wellbeing, and quality of life every single day.
During an inspection, you’re not just checking if doors are wide enough. You’re evaluating whether this space will support your goals, accommodate your support workers comfortably, integrate with your assistive technology, and genuinely feel like home.
Before the Inspection: Preparation Checklist
The most successful property inspections happen when you’re prepared. Here’s what to do before you step through that door:
Bring Your Support Team
Don’t inspect alone. Consider bringing:
- Your occupational therapist who understands your specific accessibility needs
- Your support coordinator who knows the SDA system
- A family member or trusted friend for a second perspective
- Your support worker who’ll be working in the space
Questions to Prepare in Advance
Write these down and bring them with you:
- What are my specific mobility requirements?
- What assistive technology do I currently use or plan to use?
- How many support workers will I need accommodated at once?
- What daily activities are most important to me?
- Do I need space for visitors and social activities?
- What are my sensory sensitivities (noise, light, textures)?
Documents to Bring
- Your NDIS plan and current SDA budget
- OT reports and recommendations
- List of your assistive devices and equipment
- Any medical requirements or emergency protocols
- Current tenancy agreement (if applicable) for comparison
Accessibility Features to Check: The Foundation of SDA
Accessibility isn’t an add-on, it’s the core purpose of specialist disability accommodation. Here’s what to examine closely:
Entry and Exit Points
Exterior Access:
- Pathways from parking to entrance should be smooth, level, and at least 1200mm wide
- Ramps should have appropriate gradient (no steeper than 1:14) with handrails
- High physical support properties should have minimum 1500mm wide ramps
- Check for overhead clearance if using mobility equipment
- Look for sheltered entry areas to stay dry while opening doors
Doorways and Thresholds:
- All doorways should be minimum 850mm clear width (920mm for high physical support)
- Zero or minimal thresholds, your wheelchair shouldn’t bump entering rooms
- Door handles at appropriate height and easy to grip
- Adequate maneuvering space on both sides of doors
- Check if doors can remain open or if they automatically close (safety vs. accessibility balance)
Bathroom Accessibility: Where Design Really Counts
Bathrooms are often where SDA properties succeed or fail. Examine these elements:
Ceiling Hoists and Tracking:
- Is tracking installed where you need it? (bedroom to bathroom is essential)
- Does the hoist reach the toilet, shower, and changing areas?
- Check weight capacity specifications
- Ensure adequate ceiling height and structural support
Shower and Bathing:
- Level-access shower (no step) with adequate drainage
- Shower area large enough for attendant support if needed
- Fixed and handheld shower heads at multiple heights
- Temperature control accessible from seated position
- Non-slip flooring that’s also comfortable
- Shower chair space or built-in seating
Toilet Area:
- Space on both sides for transfer (minimum 900mm on at least one side)
- Grab rails positioned correctly for your transfer method
- Appropriate toilet height (or adjustable)
- Accessible flush controls
- Space for mobile hoist if you use one
Vanity and Storage:
- Sink at appropriate height with knee clearance underneath
- Lever-style taps, not twist knobs
- Mirror positioned for use while seated
- Accessible storage for toiletries and medical supplies
Kitchen Accessibility
Layout and Maneuverability:
- Turning circle of at least 1540mm diameter
- Clear floor space in front of appliances
- Work triangle (sink, stove, fridge) within comfortable reach
Adjustable Features:
- Height-adjustable benchtops (crucial for wheelchair users)
- Lowered cooktop with side access
- Pull-out shelves and drawers instead of deep cupboards
- Accessible power points (not behind appliances)
Safety Elements:
- Sensor-activated or easy-touch taps
- Front-mounted or side-mounted oven controls
- Visual and audible alerts for appliances
- Fire safety equipment at accessible heights
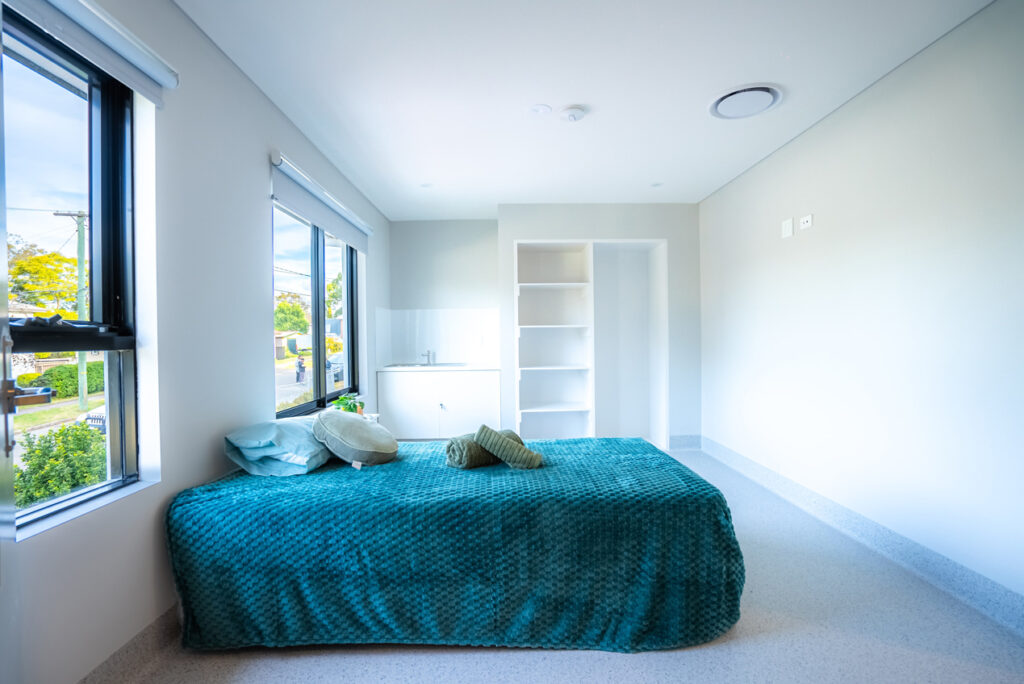
Bedroom and Living Areas
Space Planning:
- Adequate circulation space around bed (at least 900mm, preferably more)
- Room for overnight support staff if applicable
- Positioning of power points for medical equipment
- Natural light control without creating glare
Storage Solutions:
- Wardrobes with adjustable heights
- Pull-down hanging rails
- Accessible drawers and shelving
- Space for mobility equipment storage
Safety and Emergency Systems: Your Lifeline
Safety systems can literally save lives. Don’t skip this section of your inspection:
Emergency Call Systems
Modern SDA should include Personal Emergency Response Systems (PERS):
- Emergency buttons in every room (especially bathroom and bedroom)
- Check button height and accessibility
- Test if you can actually reach and activate them
- Ask about response time and monitoring service
- Verify battery backup during power outages
Voice-Activated Emergency Calls:
- Smart home technology now enables voice-activated emergency calls
- Test phrases: “Alexa, call for help” or “Hey Google, emergency”
- Ensure system works in all rooms, not just living areas
- Ask about cellular backup if internet fails
Fire Safety and Evacuation
Detection and Suppression:
- Smoke detectors in every room with visual and audible alerts
- Consider buildings with sprinkler systems for maximum safety
- Check fire extinguisher locations and accessibility
- Carbon monoxide detectors where relevant
Evacuation Planning:
- Multiple exit routes from every room
- Clear, wide egress paths for mobility equipment
- Emergency lighting along exit routes
- Ask about evacuation plans for people with mobility limitations
- Refuge areas if building has multiple levels
Security Systems
Access Control:
- Video intercom systems so you can see visitors before entry
- Remote door unlocking (especially important if you can’t reach the door quickly)
- Adequate exterior lighting
- Window locks you can operate independently
Monitoring Without Intrusion:
- Security cameras at entry points (not inside private spaces)
- Motion sensors that respect privacy
- Panic buttons separate from general emergency calls
- Ask about who has access to security footage and monitoring data
Technology and Assistive Features: The Modern SDA Advantage
This is where modern SDA properties like Gardenia Grove truly shine. Technology should empower independence, not complicate life:
Voice Control Systems
Smart home integration transforms accessibility:
- Door Control: “Alexa, open the front door” when expecting support workers or visitors
- Lighting: Voice commands for all lights eliminates searching for switches
- Temperature: Adjust heating and cooling without leaving your position
- Window Coverings: Voice-controlled blinds for privacy and light management
- Entertainment: Control TV, music, and media hands-free
During Inspection, Test:
- Ask for a demonstration of voice commands
- Try it yourself, is the system responsive?
- Check if voice recognition works with different accents or speech patterns
- Verify commands work from various positions in rooms (seated, lying down)
Smart Home Integration
Beyond voice control, look for Internet of Things (IoT) integration:
- Automated routines (lights on at sunset, doors locked at bedtime)
- Remote access via smartphone apps
- Integration with your existing assistive technology
- Compatibility with future devices you might need
Questions to Ask:
- What smart home platform is installed? (Google Home, Amazon Alexa, Apple HomeKit?)
- Can you add your own smart devices?
- Is there technical support for the system?
- What happens during internet or power outages?
Communication Systems
Video Intercom:
- See and speak with visitors before granting access
- Check screen size and positioning for visibility
- Test audio quality
- Remote unlock capability
Family and Carer Communication:
- Systems for coordinating with support workers
- Shared calendar or scheduling access
- Secure messaging for care team
- Emergency contact integration
Practical Daily Living Considerations
Beyond compliance and safety, these factors determine whether a house becomes a home:
Storage and Organization
Adequate Space:
- Storage for mobility equipment when not in use
- Linen closets you can actually access
- Kitchen pantry with pull-out shelves
- Space for hobby materials and personal items
- Secure medication storage
Organization Systems:
- Adjustable shelving you can reconfigure
- Drawers with soft-close mechanisms
- Clear bins for visibility
- Labels and organizing aids
Natural Light and Views
Lighting Quality:
- Large windows for natural light (improves mood and independence)
- Window coverings you can operate independently
- Views of outdoors from seated position
- Balance between light and privacy
Artificial Lighting:
- Adequate lighting levels for visibility
- Adjustable brightness (dimmer switches or smart bulbs)
- Task lighting in work areas
- Night lighting for safe navigation
Acoustics and Noise
Sound Management:
- Check noise from neighboring properties or units
- Visit at different times of day if possible
- Adequate sound insulation between bedrooms and living areas
- Acoustic treatments in high-echo spaces
Sensory Considerations:
- Mechanical noise from HVAC systems
- Refrigerator and appliance sounds
- External traffic or environmental noise
- Ask about soundproofing between units in shared accommodation
Privacy Zones in Shared Accommodation
If you’re viewing shared SDA:
- Private Bedroom Space: Your sanctuary should be fully private with lockable door
- Shared Common Areas: Clear boundaries and shared use agreements
- Support Worker Areas: Separate office or station for overnight assistance
- Guest Considerations: Can you have visitors in your private space?
- Storage Separation: Your items should have dedicated secure storage
Location and Community Access
Your home’s location affects daily life as much as the building itself:
Transport Accessibility
Public Transport:
- Distance to nearest bus stop or train station
- Are stops accessible with wheelchair-accessible services?
- Check Transport NSW accessibility information
- Frequency of services (hourly vs. every 15 minutes makes a difference)
Parking:
- Accessible parking on-site
- Covered parking for weather protection
- Space for support worker vehicles
- Loading zones for equipment
Essential Services Proximity
Medical Services:
- Nearest hospital with emergency department
- GP clinics nearby (preferably accessible)
- Allied health services in area (physio, OT)
- Pharmacy within reasonable distance
- Specialists relevant to your conditions
Daily Needs:
- Grocery stores (delivery options?)
- Banks and ATMs
- Post office
- Accessible cafes and restaurants
Community and Social Opportunities
Recreation and Engagement:
- Parks and outdoor spaces with accessible pathways
- Community centers with inclusive programs
- Libraries with accessibility features
- National Disability Services directory for local programs
- Places of worship if relevant to you
- Hobby or interest groups
Social Support:
- Proximity to family and friends
- Existing community connections
- Peer support networks
- Advocacy services available locally
Building Quality and Maintenance Standards
Even the best-designed SDA property fails if it’s poorly built or maintained:
Construction Quality Indicators
Structural Elements:
- Walls, floors, and ceilings should be straight and true
- No cracks in plaster or brickwork
- Doors and windows should open smoothly
- Check for water stains or moisture issues
- Flooring should be level without warping
Finishes and Details:
- Professional paint application without drips
- Tiles properly grouted and sealed
- Fixtures firmly attached to walls
- Electrical outlets and switches properly installed
- Quality of door hardware and handles
Cleanliness and Presentation
Current State:
- Property should be clean for inspection
- Functioning appliances and systems
- Fresh paint and modern finishes
- Well-maintained gardens and exteriors
- No deferred maintenance issues visible
Age and Modernization:
- When was property built or last renovated?
- Are systems and appliances current generation?
- Has technology been updated or is it outdated?
- Planned upgrades or maintenance schedules
Maintenance Responsiveness
Critical Questions:
- What’s the response time for urgent maintenance (toilet, heating, accessibility equipment)?
- Who handles repairs, property manager or specialized technicians?
- Is there 24/7 emergency maintenance contact?
- What’s the process for requesting repairs?
- Ask for examples: “When the last issue occurred, how long did repairs take?”
Provider and Management Questions to Ask
The property is only part of the equation. The provider determines your ongoing experience:
Tenancy Terms and Conditions
Agreement Specifics:
- Lease length and renewal terms
- Notice periods for changes
- Rent increase policies (check NSW Fair Trading guidelines)
- Bond or deposit requirements
- Your rights under residential tenancy laws
Flexibility:
- Can you personalize your space? (pictures, paint colors)
- Pet policies (if relevant)
- Guest overnight policies
- Support worker access arrangements
Service Delivery Model
Property Management:
- Who manages the property day-to-day?
- Are they NDIS registered providers?
- Experience with high physical support needs
- Staff training on disability awareness
Support Coordination:
- Does the provider assist with connecting to support services?
- Relationships with local support providers
- Help with NDIA processes
- Assistance with plan reviews
Communication and Complaint Resolution
Regular Communication:
- How often will you hear from property management?
- What’s the preferred communication method?
- Who’s your primary contact person?
- Access to property owner or only through managers?
Issue Resolution:
- Formal complaints process (NDIS Commission backed)
- Response timeframes for different issue types
- Escalation pathways
- Independent advocacy support available
Provider Stability and Reputation
Research the Provider:
- How long have they been operating in SDA?
- Number of properties in their portfolio
- References from current tenants (ask to speak with them)
- NDIS Commission registration status
- Any quality and safeguard reports
Financial Viability:
- Established provider with proven track record
- Adequate insurance coverage
- Long-term sustainability plans
- Department of Social Services compliance
Red Flags to Watch For
Sometimes what you don’t see is as important as what you do. Here are warning signs that should make you think twice:
Immediate Deal-Breakers
🚩 Safety Issues:
- Emergency call buttons not working or missing
- Blocked fire exits or evacuation routes
- Unsafe electrical wiring or loose fixtures
- Tripping hazards or uneven surfaces
- Mold, water damage, or structural problems
🚩 Accessibility Failures:
- Doorways too narrow for your equipment
- Bathrooms with inadequate space or equipment
- Steps or barriers without alternative access
- Controls and switches out of reach
- Hoists or equipment insufficient for your needs
Provider Red Flags
🚩 Communication Problems:
- Provider unwilling to answer questions directly
- Vague responses about maintenance or repairs
- Pressure tactics to sign immediately
- Won’t provide written tenancy terms in advance
- Discourages bringing support team to inspection
🚩 Financial or Legal Issues:
- Requests for cash payments or unusual deposit terms
- Not properly registered with NDIS
- Can’t provide proof of insurance
- Unclear about rent calculations or SDA payments
- History of disputes with previous tenants
Property Condition Red Flags
🚩 Maintenance Concerns:
- Visible deferred maintenance
- Old or malfunctioning assistive technology
- Broken fixtures or appliances
- Poor cleaning or presentation
- Strong odors suggesting hidden problems
🚩 Design Shortcomings:
- Accessibility features feel like afterthoughts
- Technology systems overly complicated or outdated
- Insufficient storage for equipment and supplies
- Poor layout impeding independence
- Not built to current SDA design standards
Your Complete SDA Property Inspection Checklist
Print this checklist and bring it to every inspection:
Pre-Inspection Preparation
- Occupational therapist or support coordinator attending
- Questions list prepared
- NDIS plan and budget documents
- Camera or phone for photos (with permission)
- Assistive technology measurements and specifications
- Current tenancy agreement for comparison
Exterior and Entry
- Accessible parking with weather protection
- Level, smooth pathways (minimum 1200mm wide)
- Appropriate ramp gradient with handrails
- Sheltered entrance area
- Exterior lighting adequate for night access
- Doorbell at accessible height (or video intercom)
Doorways and Circulation
- All doorways minimum 850mm clear width
- Zero or minimal thresholds throughout
- Easy-operation door handles
- Adequate turning circles (1540mm) in all rooms
- Wide hallways allowing equipment passage
- Level flooring throughout
Bathroom Accessibility
- Ceiling hoist with appropriate tracking
- Level-access shower with adequate drainage
- Space for attendant support
- Correctly positioned grab rails
- Accessible vanity with knee clearance
- Toilet transfer space both sides
- Emergency call button accessible from toilet and shower
- Non-slip, comfortable flooring
Kitchen Accessibility
- Height-adjustable benchtops
- Adequate turning space (1540mm circle)
- Pull-out shelves and accessible storage
- Side-access cooktop with front controls
- Accessible power points
- Easy-operation taps
- Work triangle within comfortable reach
Bedroom and Living Spaces
- Adequate space around bed (900mm minimum)
- Accessible power points for medical equipment
- Storage with adjustable heights
- Natural light with controllable window coverings
- Sufficient space for mobility equipment
- Privacy from other residents if shared accommodation
Safety and Emergency Systems
- Emergency call buttons in all rooms
- Voice-activated emergency backup
- Smoke detectors with visual and audible alerts
- Clear evacuation routes
- Fire extinguisher accessible
- Emergency lighting functional
- Security system with accessible controls
Technology and Smart Features
- Voice control demonstrated and tested
- Smart home integration working
- Video intercom functional
- Automated lighting responsive
- Temperature control accessible
- Internet connectivity adequate
- Mobile app access (if applicable)
Building Quality
- Walls, floors, ceilings straight and sound
- No visible cracks or structural issues
- Windows and doors operate smoothly
- Professional finish quality
- No water stains or moisture issues
- Modern appliances and fixtures
- Clean and well-maintained throughout
Location and Accessibility
- Public transport within reasonable distance
- Medical services nearby
- Grocery and essential services accessible
- Community facilities and social opportunities
- Quiet neighborhood appropriate to needs
- Safe, well-lit surroundings
Provider and Management
- NDIS registered provider verified
- Clear tenancy terms provided in writing
- Maintenance response times specified
- 24/7 emergency contact provided
- Complaints process explained
- Current tenant references offered
- Provider experience in SDA confirmed
What Happens After the Inspection
You’ve completed your inspection, now what?
Immediate Follow-Up (Within 24-48 Hours)
- Debrief with your support team about what you observed
- Review your checklist and photos together
- Compare to other properties you’ve inspected
- List any additional questions that arose
- Contact the provider for clarification if needed
Making Your Decision
Consider These Factors:
- Does the property meet your physical needs now and in the foreseeable future?
- Will it support your independence and NDIS goals?
- Is the location suitable for your lifestyle and support network?
- Does the provider demonstrate professionalism and responsiveness?
- Is the technology reliable and truly helpful (not just gimmicky)?
- Can you see yourself living here long-term?
Don’t Rush:
- You’re making a significant decision about your daily life
- It’s okay to inspect multiple times or properties
- Discuss with your entire support team before committing
- Review all written terms carefully before signing
- Consider a trial period if available
Securing the Property
Once You’ve Decided:
- Submit formal application with required documentation
- Review and negotiate tenancy agreement terms
- Clarify SDA payment arrangements with NDIA
- Coordinate move-in date with support services
- Arrange utility connections and technology setup
- Plan your move with adequate support
Frequently Asked Questions
How long should an SDA inspection take? Allow at least 60-90 minutes for a thorough inspection. If you’re considering high physical support accommodation, plan for 2+ hours to properly test equipment and systems. Don’t let anyone rush you through the process.
Can I bring more than one support person? Absolutely! In fact, we encourage bringing your occupational therapist, support coordinator, family member, or trusted friend. Multiple perspectives help you make better decisions. At Sunrise SDA, we welcome your entire support team and provide refreshments.
What if I need to see a property multiple times before deciding? That’s completely reasonable and shows you’re being thoughtful about this important decision. Reputable providers will accommodate multiple visits, perhaps at different times of day. If a provider discourages this, consider it a red flag.
Should I test the assistive technology during inspection? Yes! Don’t just listen to explanations, actually try the voice commands, emergency buttons, door controls, and other features. Test them from various positions (seated, lying down if relevant). The only way to know if technology works for you is to use it yourself.
What if the property meets most but not all requirements? Distinguish between negotiable and non-negotiable items. Safety and essential accessibility features are non-negotiable. Some aesthetic preferences or minor modifications might be negotiable with the provider. Discuss potential modifications before committing.
How do I know if the SDA design category matches my funding? Check your NDIS plan for your approved SDA design category (Improved Liveability, Fully Accessible, Robust, or High Physical Support). The property must match or exceed your approved category. Your support coordinator can help verify this alignment.
Can I request modifications to the property? Some modifications may be possible, especially minor personalization like paint colors or fixtures. Major accessibility modifications should ideally be in place before you move in. Discuss modification policies during inspection, get any promises in writing.
What happens if equipment breaks after I move in? This is why asking about maintenance response times during inspection is crucial. Emergency equipment (hoists, emergency calls) should have 24-hour response. Non-emergency items should have clear timeframes. Verify these terms are in your tenancy agreement.
How do I verify a provider is legitimate? Check NDIS provider registration status, ask for references from current tenants, verify business registration with ASIC, and confirm appropriate insurance coverage. Don’t hesitate to do your due diligence, reputable providers expect and welcome it.
What if I feel pressured to decide quickly? Legitimate providers understand that SDA decisions require careful consideration and support team consultation. Pressure tactics are a red flag. Take the time you need. Your NDIS support coordinator can advocate if you’re feeling rushed.
Ready to Experience the Sunrise SDA Difference?
Finding the right SDA property changes everything. At Sunrise Disability Accommodation, we don’t just build houses, we create homes where independent living becomes reality, supported by cutting-edge technology designed specifically for people with high-care needs.
Our properties in Greater Western Sydney showcase what modern specialist disability accommodation should be:
- All four SDA design categories available to match your specific needs
- Advanced assistive technology as standard, not optional add-ons
- Voice-controlled systems for doors, lights, temperature, and emergency calls
- Complete service from site selection through ongoing property management
- Obligation-free consultations and inspections where we take time to answer all your questions (coffee included!)
Whether you’re exploring your first SDA property or looking to upgrade from current accommodation, we’re here to help you make an informed decision without pressure or obligation.
Schedule Your Inspection Today
Call us: 1300 71 06 71
Email: info@sunriseda.com.au
Visit: sunriseda.org/contact
Our team, led by construction engineer Reza Ardalan and architect Tina Kordrostami, brings real disability sector experience to every property. We understand high-care needs because we work with participants daily. We don’t just know the compliance requirements, we understand what makes a house truly work as a home.
Visit our current properties:
- Gardenia Grove, Lalor Park – Smart home technology showcase
- Northcott Road, Lalor Park – High Physical Support excellence
Take this checklist with you, bring your support team, and experience the difference that purpose-built, technology-enabled SDA makes. We’ll walk through every feature together, answer every question, demonstrate every system, and ensure you have all the information needed to make the best decision for your life.
Because at Sunrise, we don’t just build houses. We make homes where living truly begins.
For more information about SDA options and support, visit the National Disability Services website or contact Sunrise Disability Accommodation directly.
Office Location: 1 Gardenia Grove, Lalor Park, NSW 2147
Contact: 1300 71 06 71 | info@sunriseda.com.au
Web: https://sunriseda.org/
This guide is for informational purposes and should be used alongside advice from your occupational therapist, support coordinator, and other qualified professionals. SDA requirements and NDIS policies may change; always verify current information with the NDIA and NDIS Commission.